To calibrate your air quality monitor, start by consulting the user manual for specific instructions. Make sure your environment is clean, stable, and free of pollutants. Gather calibration standards like certified gases or clean air. Follow the manufacturer’s step-by-step process, exposing the sensor to known air quality conditions and making adjustments so readings match standard levels. Once complete, log your calibration. If you keep going, you’ll discover detailed tips to ensure ongoing accuracy and maintenance.
Key Takeaways
- Review the user manual for specific calibration instructions and recommended intervals.
- Prepare a clean, stable environment and gather certified calibration gases or standards.
- Enter calibration mode following manufacturer guidelines, then expose the sensor to calibration standards.
- Adjust the device readings to match known calibration values, saving settings afterward.
- Log calibration details, and schedule regular recalibrations based on device prompts or environmental conditions.

Calibrating your air quality monitor is essential to guarantee accurate and reliable readings. Over time, sensors can drift, causing measurements to become less precise. Ensuring sensor accuracy is critical, especially if you’re monitoring air quality for health reasons or environmental compliance. Regular calibration helps maintain the device’s reliability, but understanding how often to calibrate depends on the specific model and usage conditions. Many manufacturers recommend calibration frequency every few months, though this can vary based on environmental factors such as humidity, temperature, and pollutant levels. Ignoring proper calibration intervals risks inaccurate data, which defeats the purpose of using the device in the first place.
Regular calibration ensures your air quality monitor provides accurate, reliable readings over time.
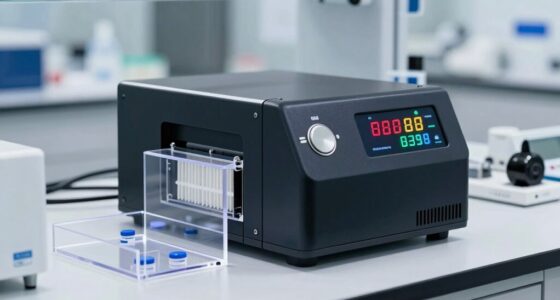
To begin, review your monitor’s user manual to determine the recommended calibration procedures and schedule. Most devices have a built-in calibration mode or a dedicated process for fine-tuning sensors. Before starting, ensure your environment is suitable for calibration—ideally, a clean, stable setting with known air quality conditions. If your monitor supports calibration with a reference standard, such as a known concentration of pollutants or a calibration kit, gather these supplies. Using a certified calibration source is vital because it provides a benchmark for adjusting your sensor’s accuracy.
Next, follow the step-by-step process outlined by the manufacturer. Typically, this involves turning on the device and steering to calibration mode. You might need to expose the sensor to a calibration gas or a clean air environment, depending on the sensor type. During this process, the device compares the sensor’s current readings to the known standard, adjusting its internal settings to align with accurate values. Make sure to handle calibration gases carefully and follow safety instructions. Once calibration is complete, confirm that the device displays readings consistent with the known standard, and save the adjustments as instructed. Regularly performing calibration checks is crucial to guarantee ongoing sensor accuracy. Even after initial calibration, environmental factors or sensor aging can cause drift, diminishing reliability over time. Keep a log of calibration dates and results, and schedule routine recalibrations accordingly. If your device shows inconsistent readings or drifts considerably from expected values, recalibrate sooner. Additionally, some monitors have self-calibration features or alerts that notify you when calibration is due; pay attention to these prompts to maintain precision. To further improve calibration accuracy, it is beneficial to understand how sensor drift can impact your device’s measurements over time.
Frequently Asked Questions
How Often Should I Calibrate My Air Quality Monitor?
You should calibrate your air quality monitor every 1 to 3 months to maintain sensor accuracy. Regular calibration guarantees that the sensor accuracy remains high, preventing false readings. If you notice inconsistent data or your monitor is exposed to extreme conditions, increase calibration frequency. Consistent calibration helps you trust your device and get reliable air quality measurements, especially in environments where accurate data is essential for health and safety.
What Signs Indicate My Monitor Needs Recalibration?
You’ll want to recalibrate your monitor if you notice sensor drift or display inaccuracies. If readings suddenly fluctuate or don’t match expected levels, it’s a clear sign the sensor needs adjustment. Also, persistent discrepancies compared to reference measurements or external monitors indicate recalibration is necessary. Regularly checking these signs helps guarantee your air quality data remains accurate, so trust your monitor’s display and address issues promptly.
Can I Calibrate My Device at Home Without Professional Help?
Think of your air quality monitor as a ship steering through fog; calibration guarantees it stays on course. You can perform DIY calibration at home using basic calibration tools, but it requires careful attention and some technical know-how. Follow manufacturer instructions closely, and make certain your environment meets the calibration standards. While it’s possible, professional help can provide more precise results, especially if you’re unsure or the device shows persistent inaccuracies.
Which Calibration Gases or Standards Are Recommended?
You should use certified calibration gases and standards that match the specific pollutants your air quality monitor detects. Look for calibration gases with known concentrations, usually supplied by reputable suppliers, to guarantee accuracy. Calibration standards should be traceable to national or international standards, providing consistent and reliable results. Always follow your device’s manufacturer instructions regarding recommended calibration gases and standards for precise calibration and peak performance.
How Long Does the Calibration Process Typically Take?
The calibration process typically takes about 15 to 30 minutes, depending on your air quality monitor and calibration method. You’ll need to allow enough time for the device to stabilize and accurately read the reference standards. The process time can vary if you’re using more complex calibration gases or multiple standards. Make sure you follow the manufacturer’s instructions carefully to guarantee your monitor’s calibration duration is sufficient for precise results.
Conclusion
Think of calibrating your air quality monitor as tending to a delicate garden. With each careful adjustment, you nurture its accuracy, allowing it to flourish like a well-tended bloom. Just as a gardener’s keen eye ensures vibrant growth, your precise calibration guarantees trustworthy readings. Keep nurturing this process, and your monitor will serve as a steadfast guardian of your indoor air, revealing the hidden truths just like a seasoned gardener uncovers the secrets beneath the leaves.