If your washer shows a ‘continuous drain’ error, it’s often caused by issues with your drain hose, like improper installation, kinks, damage, or clogs. Make sure the hose is routed correctly at the right height, free of bends or debris, and securely connected. Regular inspection and cleaning can prevent problems, but if issues persist, replacing the hose might be necessary. Keep going to learn more solutions to keep your drain system working smoothly.
Key Takeaways
- Improper hose positioning, such as incorrect height or high loops, can cause drainage issues and prevent proper water flow.
- Kinks, bends, or twists in the hose restrict water movement, leading to continuous draining errors.
- Clogs or buildup of debris inside the hose block water flow, causing drainage failures.
- Damaged or cracked hoses leak or collapse, disrupting drainage and triggering continuous drain errors.
- Loose fittings or disconnections at hose connections can cause leaks and prevent proper drainage.
Why Is My Drain Hose Causing the ‘Continuous Drain’ Error?
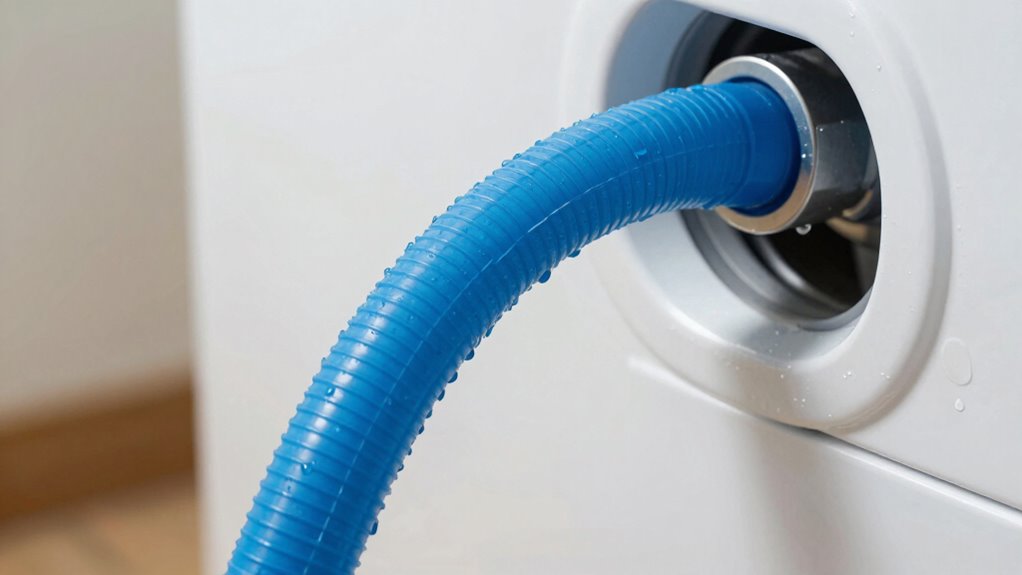
A common reason your washer displays the ‘Continuous Drain’ error is a problem with the drain hose. If the hose isn’t positioned correctly, it can disrupt water flow, triggering the error message. Make sure the hose is installed at the proper height—usually between 30 to 96 inches from the bottom of the washer—and secured firmly. Improper hose positioning can cause water to drain too slowly or get trapped, which confuses the machine’s sensors. Additionally, a kinked or bent hose can restrict water flow, leading to continuous draining issues. Check that the hose is straight and free of obstructions. Proper installation and positioning of the drain hose are key steps in resolving this common drain problem, and ensuring the correct hose height can prevent recurring errors. Regularly inspecting your drain hose connections can also help identify potential issues before they cause problems. Ensuring the drain hose material is suitable and free of cracks can further improve drainage performance and prevent leaks. Using proper drainage equipment can ensure consistent water flow and avoid recurring error messages.
Common Drain Hose Problems That Lead to Drain Failures

Many drain hose issues can cause your appliance to fail. You might notice clogs, improper hose placement, or cracks and damage in the hose. Identifying these common problems can help you prevent costly repairs and keep everything running smoothly. Ensuring proper gear care techniques can extend the lifespan of your drain hose and improve overall appliance performance. Regular maintenance practices can also help detect potential issues early before they lead to more significant failures. Additionally, understanding regional flavors and materials used in hoses can inform better selection and care. Being aware of high-quality product roundups can help you choose reliable replacement parts and accessories for your appliance needs. Incorporating the right testing accuracy tools can further assist in diagnosing problems effectively and ensuring your appliance functions optimally.
Clogged Drain Hoses
Clogged drain hoses are a common culprit behind drain failures, often caused by debris, soap scum, or mineral buildup accumulating over time. The hose material, whether rubber, plastic, or reinforced, influences how easily clogs form. Incorrect installation height can also trap debris or cause water to stagnate, worsening clogs. To prevent issues, check for blockages regularly and ensure proper setup. Here are some common causes of clogs:
- Debris buildup inside the hose, especially if the hose material is prone to trapping particles.
- Soap scum accumulating, particularly if the hose is positioned too low or at an improper installation height.
- Mineral deposits hardening and restricting flow, often worsened by poor hose material choice or inadequate maintenance.
- Regular maintenance and proper positioning are essential to keep drain hoses clear and functional.
Keeping the hose clear and correctly positioned helps prevent clogs and prolongs its lifespan.
Improper Hose Placement
Improper hose placement is a common cause of drain failures because it disrupts proper water flow and encourages debris buildup. If your hose isn’t positioned correctly, water may back up or leak, leading to drainage issues. Proper hose positioning involves maintaining a downward slope, ensuring the hose doesn’t kink or bend sharply, which can restrict flow. Drain hose routing should avoid high loops or dips that trap water or debris, and it should extend correctly into the drain or standpipe. Misaligned or poorly routed hoses can cause water to pool or flow improperly, increasing the risk of clogs and leaks. To prevent these problems, check that your drain hose is securely connected, properly sloped, and routed according to manufacturer instructions. Proper hose placement is essential for ensuring effective drainage and preventing failures. Correct installation techniques help maintain optimal water flow and minimize drain failures. Additionally, proper hose routing can prevent unnecessary stress on connections and reduce the likelihood of disconnections or leaks. Proper hose placement keeps water flowing smoothly and minimizes drain failures.
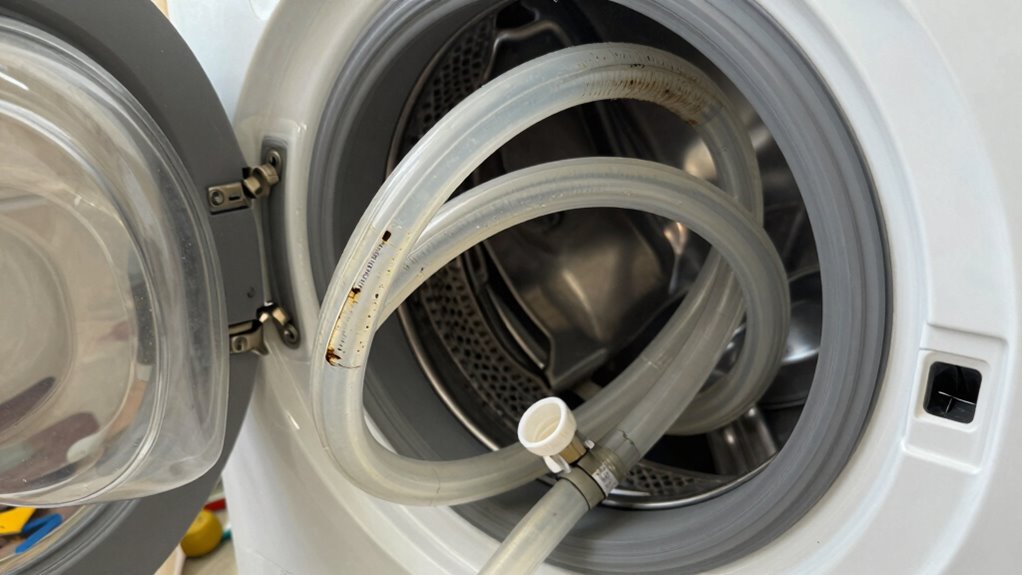
Cracked or Damaged Hoses
Cracked or damaged hoses are a common cause of drain failures because leaks and blockages often result from compromised hose integrity. Over time, the hose material can weaken, crack, or split, especially if exposed to harsh chemicals or extreme temperatures. The hose length also plays a role; an excessively long hose may kink or bend sharply, increasing stress on the material. Regular inspection and choosing the right hose material and length helps prevent failures. Additionally, selecting durable materials designed for long-term use can significantly reduce the risk of deterioration and damage. Using appropriate installation techniques can also minimize undue stress and extend the lifespan of the hose. Incorporating proper maintenance practices ensures early detection of wear and tear, further enhancing the longevity of the drain hose. Properly maintaining hose connections can prevent leaks caused by loose fittings or improper sealing, which are common issues leading to failure. Maintaining a proper hose layout can prevent unnecessary strain and improve overall system reliability.
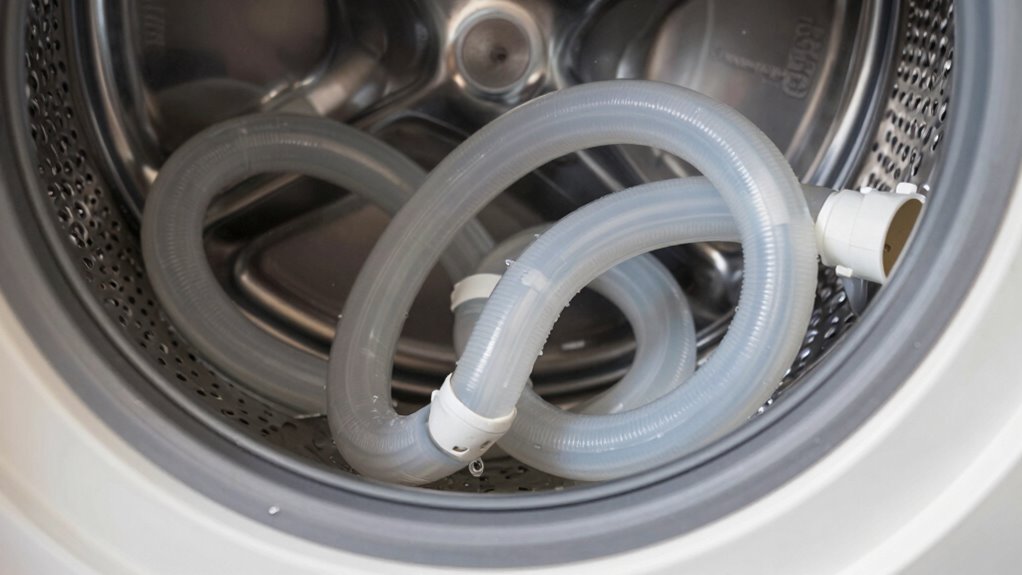
How to Inspect Your Drain Hose for Kinks, Clogs, or Damage

Start by checking your drain hose for any kinks or sharp bends that could block water flow. Then, inspect inside for clogs or debris that might be causing drainage issues. Finally, look for any signs of physical damage, such as cracks or leaks, that may need repair or replacement. To prevent future problems, consider understanding how seasons affect drainage and ensure your system is prepared for weather changes. Additionally, reviewing the impact of climate variations on drainage systems can help you take proactive measures. Incorporating maintenance practices into your routine can also extend the lifespan of your drainage components and prevent unexpected failures.
Check for Kinks
To guarantee your drain hose isn’t causing problems, start by inspecting it for any kinks or bends that could restrict water flow. Kinks can impede proper drainage and cause your appliance to malfunction. Check the hose’s positioning to ensure it’s straight and not twisted, which can also restrict water flow. Here are some steps to follow:
- Examine the entire length of the hose for any sharp bends or twists.
- Verify that the hose is securely attached and not sagging.
- Straighten out any kinks or bends you find, and reposition the hose if necessary.
Proper hose positioning helps maintain unrestricted water flow, preventing backups and leaks. Regularly inspecting for kinks keeps your drainage system running smoothly.
Inspect for Clogs
Even if your drain hose looks fine on the outside, blockages can still occur inside, impeding water flow. Start by disconnecting the hose and inspecting its interior for clogs. Depending on the hose material—rubber, plastic, or flexible corrugated—use a long brush or flexible cleaning tool to remove debris or buildup. Check the drain pipe connection for any obstructions or accumulated residue. If the hose feels stiff or brittle, it might be more prone to clogs or damage. Run water through the hose to see if it flows freely. If water backs up or drains slowly, you’ve likely found a clog that needs clearing. Regular inspection helps prevent future blockages, ensuring your drain system remains efficient.
Detect Physical Damage
Inspecting your drain hose for physical damage is essential to guarantee proper water flow. Over time, the hose material can crack, split, or develop leaks, especially if it’s old or exposed to harsh conditions. Check the entire drain hose length for kinks, bends, or sharp twists that could restrict water movement. Damaged sections or areas where the hose has been pinched can cause drainage problems and should be replaced promptly. When inspecting, pay attention to the hose material—flexible rubber or plastic hoses are more prone to damage. Also, ensure the drain hose length isn’t too long or stretched tight, as this increases the risk of kinks. Regular inspections help catch damage early, preventing more significant issues down the line.
Simple Fixes for Drain Hose Problems Without Replacing It
Many drain hose problems can be fixed quickly and easily without needing a full replacement. Start by inspecting the hose material; if it’s cracked or brittle, a simple cleaning or repositioning might solve the issue. Sometimes, kinks or bends in the hose cause drainage problems, so straighten it out or adjust its placement. Check the hose length—if it’s too long, it can trap water or cause blockages, so trim it to the proper length. Ensure the hose is securely connected and not loose, which can lead to leaks or drainage failure. Clear any debris or buildup inside the hose with a gentle flush or brush. These simple steps often resolve common issues without the need for replacement, saving you time and money.
When and Why Should You Replace Your Drain Hose?

You should consider replacing your drain hose when it shows signs of significant damage or persistent issues that can’t be fixed through simple repairs. Over time, the hose material can crack, become brittle, or develop leaks, especially if exposed to harsh conditions. The installation location also matters—if your hose is installed in a tight or awkward spot, it may wear out faster or be prone to kinks. Replacing the hose ensures proper drainage and prevents leaks that could cause water damage. Consider replacing your drain hose if:
Replace your drain hose if it cracks, leaks, or kinks to ensure proper drainage and prevent water damage.
- The hose material is cracked, brittle, or has visible holes
- It’s become disconnected or leaks persist despite repairs
- The installation location causes undue stress or kinking on the hose
Timely replacement guarantees ideal performance and avoids costly repairs.
Installing and Maintaining Your Drain Hose to Prevent Future Issues

Proper installation and ongoing maintenance of your drain hose can considerably reduce the chances of future problems. When performing hose installation, guarantee the hose is securely connected, with no kinks or bends that could obstruct flow. Keep the hose elevated and avoid sharp turns to prevent water from pooling or backing up. Regular maintenance practices include inspecting the hose for cracks, clogs, or leaks, and cleaning it when necessary. Check that the hose is properly supported and free of debris that could cause blockages. Always secure connections tightly to prevent leaks or disconnections during operation. By following these simple steps, you’ll help ensure your drain hose functions smoothly, reducing the risk of clogs, backups, and the need for repairs down the line.
Tips to Keep Your Drain Hose Working Smoothly for the Long Term

To keep your drain hose functioning smoothly over the long term, regular inspections are essential. This helps you catch potential issues early and maintain ideal performance. Here are some maintenance tips and replacement techniques to evaluate:
- Check for cracks, leaks, or blockages regularly, and clean the hose to prevent buildup.
- Replace worn or damaged hoses promptly, ensuring you select the correct size and type for your appliance.
- Secure connections tightly to prevent leaks and disconnections during operation.
Frequently Asked Questions
Can a Drain Hose Cause Water Leaks Elsewhere in My Appliance?
Yes, a drain hose can cause water leaks elsewhere in your appliance if it’s clogged or improperly installed. A clogged hose can lead to backups and leaks, while improper installation might create loose connections or kinks that allow water to escape. Regularly check your drain hose for blockages and make sure it’s fitted correctly to prevent leaks and keep your appliance running smoothly.
What Tools Are Needed to Replace a Damaged Drain Hose?
To replace a damaged drain hose, you’ll need a screwdriver to loosen hose clamps and possibly pliers for stubborn ones. Start by removing the clamps securing the hose, then carefully detach the damaged hose from the connections. Replace it with a new hose, making certain it’s the correct size, and secure it with the clamps. Tighten the clamps firmly during hose replacement to prevent leaks and ensure proper drainage.
How Often Should I Inspect My Drain Hose for Problems?
You should inspect your drain hose every three to six months, following an inspection schedule to catch issues early. Look for warning signs like leaks, cracks, or clogs, which indicate problems needing attention. Regular inspections help prevent water damage and appliance malfunctions. If you notice any signs of trouble, address them promptly to maintain proper drainage and ensure your appliance runs smoothly.
Are There Specific Types of Drain Hoses Better for Durability?
You’ll want to choose drain hoses made from flexible materials, which make installation easier and reduce cracking over time. Look for reinforced designs that add durability and resist kinks or leaks, especially if your setup involves tight bends. These features help guarantee your drain hose lasts longer and performs reliably. Investing in a high-quality, reinforced, flexible hose can prevent common issues and keep your continuous drain system functioning smoothly.
What Are Common Mistakes to Avoid When Installing a Drain Hose?
Did you know that improper installation causes 60% of drain hose leaks? To avoid installation pitfalls, make certain you don’t kink or bend the hose sharply, which can block drainage. Use secure techniques like clamps and check that the hose is positioned at the correct height to prevent backflow. Avoid loose fittings or inadequate securing, as these can lead to leaks or disconnections, compromising your appliance’s performance.
Conclusion
By caring for your drain hose, you keep your laundry flowing like a well-oiled machine. Regular inspections and prompt fixes prevent small issues from snowballing into big headaches. Think of your drain hose as the bloodstream of your appliance—keep it healthy, and your washer will run smoothly, avoiding the ‘continuous drain’ error. With a little attention, you’ll ensure your drain system stays dependable, so laundry day stays stress-free rather than a tangled mess.