Keeping your Keurig K-Mini clean is essential for maintaining great-tasting coffee and extending the life of your machine. Regular cleaning prevents mineral buildup, residue, and flavor carry-over, ensuring each brew is fresh and flavorful.
Follow these straightforward steps to keep your Keurig K-Mini in top shape, using safe and effective methods tailored for this compact coffee maker.
Key Takeaways
| Regular Cleaning is Key | Prevents mineral buildup and flavor carry-over. |
| Use Proper Products | Descaling solutions and rinse pods ensure thorough cleaning. |
| Frequency Matters | Clean monthly and descale every 3 months for optimal performance. |
| Safe Handling | Always unplug before cleaning to avoid electrical hazards. |

Keurig K-Mini Single Serve K-Cup Pod Coffee Maker, 6 to 12oz Brew size, with Cord Storage, Perfect for Small Spaces, Black
FITS ANYWHERE: Less than 5 inches wide, perfect for small spaces.
As an affiliate, we earn on qualifying purchases.
Gather Your Supplies
- Descaling solution (preferably Keurig’s Descale Solution)
- Rinse pods or cleaning brushes
- Clean, damp cloth

My K-Cup® Reusable Coffee Filter
BREW WITH GROUND COFFEE: Brew a single cup using your own favorite ground coffee
As an affiliate, we earn on qualifying purchases.
Unplug and Empty
Always unplug your Keurig K-Mini before cleaning. Remove the water reservoir and empty any remaining water.
Wipe the exterior with a damp cloth to remove dust and spills.
Clean the Water Reservoir and Drip Tray
- Wash the water reservoir with warm, soapy water, rinse thoroughly, and dry.
- Remove the drip tray, wash with soapy water, rinse, and dry.
Descale the Machine
Pour the descaling solution into the water reservoir (follow the product instructions). Fill with water up to the max line.
Place a large mug on the drip tray and run a brew cycle without a K-Cup. Repeat until the reservoir is empty.
Rinse by filling with clean water and running 2-3 brew cycles to flush out any residue.
Clean the Needle and K-Cup Holder
Use a rinse pod or a small brush to gently clean around the needle and K-Cup holder to remove any trapped coffee grounds or oils.
The Products in This Guide
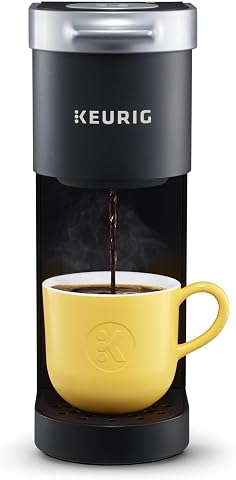
Keurig K-Mini Single Serve K-Cup Pod Coffee Maker
- ✔ Capacity: 6-12oz
- ✔ Size: Less than 5 inches wide
- ✔ Features: Cord storage, removable drip tray, auto off
My K-Cup® Reusable Coffee Filter
- ✔ Material: Plastic
- ✔ Use: Ground coffee
- ✔ Compatibility: Keurig K-Mini
Keurig K-Mini Single Serve K-Cup Pod Coffee Maker
The Keurig K-Mini offers a straightforward, space-saving design ideal for small kitchens or offices. Regular cleaning ensures consistent performance and flavor.
Pros:
- Compact size fits anywhere
- Easy to clean and descale
- Brews quickly
- Removable drip tray
Cons:
- Limited water reservoir capacity
- No programmable features
- Requires frequent refilling
Best for: Small kitchens, offices, dorm rooms
Not ideal for: Heavy daily use or large households
Bottom line: The Keurig K-Mini is a reliable, space-efficient choice if you clean it regularly.
My K-Cup® Reusable Coffee Filter
The My K-Cup® Reusable Coffee Filter allows you to brew your favorite ground coffee with the Keurig K-Mini, offering versatility and cost savings.
Pros:
- Brew with ground coffee
- Eco-friendly reuse
- Easy to clean
- Compatible with K-Mini
Cons:
- Requires measuring grounds
- May clog if overfilled
- Not suitable for all coffee types
Best for: Custom coffee blends, saving money
Not ideal for: For those preferring convenience of pods
Bottom line: A practical accessory for brewing your own ground coffee in the K-Mini.
Frequently Asked Questions
How often should I descale my Keurig K-Mini?
It is recommended to descale your Keurig K-Mini every 3 months to prevent mineral buildup and ensure optimal performance.
Can I use vinegar instead of descaling solution?
While some users opt for vinegar, it is generally safer and more effective to use a descaling solution specifically designed for coffee makers, like Keurig’s Descale Solution.
How do I clean the needle that punctures the K-Cup?
Use a rinse pod or a small brush to gently clean the needle and remove any trapped coffee grounds or oils that could clog it.
Is it safe to put the water reservoir in the dishwasher?
It’s best to wash the reservoir with warm, soapy water and avoid placing it in the dishwasher to prevent damage.
Keep Your Coffee Fresh with Regular Maintenance
Regular cleaning and descaling are essential for maintaining the quality and longevity of your Keurig K-Mini. With simple steps and proper products, you can enjoy fresh, flavorful coffee every time. Make cleaning part of your routine to keep your machine running smoothly and your beverages tasting their best.
Affiliate disclosure: As an Amazon Associate we earn from qualifying purchases. Prices and availability are accurate as of the time of publishing.