To craft your own HEPA filter box, gather a sturdy container, a high-quality HEPA filter, and an adjustable fan. Securely attach the filter to the fan’s inlet, seal all gaps with tape, and position the fan to pull air through the filter. Regularly check and replace the filter when dirty. For tips on optimizing your setup and maintaining it efficiently, explore more to guarantee your space stays fresh and clean.
Key Takeaways
- Select a sturdy container and attach a high-quality HEPA filter securely to ensure airtight sealing.
- Use duct tape or sealant to seal all gaps around the filter and prevent unfiltered air bypass.
- Connect the fan to pull air through the filter, positioning it for optimal airflow and efficiency.
- Regularly inspect and replace the filter when dirty or clogged to maintain purification effectiveness.
- Enhance performance by adding washable pre-filters and ensuring proper sealing and maintenance.
Improving your indoor air quality doesn’t have to be expensive or complicated. In fact, with a few simple materials and some basic DIY skills, you can craft a highly effective HEPA filter box to markedly reduce airborne pollutants. The key is understanding how to enhance your air quality while maintaining your filter properly. Regular filter maintenance is essential because, over time, filters get clogged with dust, allergens, and other particles, which diminishes their effectiveness. By keeping your filter clean and replacing it when necessary, you guarantee your DIY air purifier continues to work efficiently, providing cleaner air and healthier indoor environments.
Enhance indoor air quality with simple DIY HEPA filters and regular maintenance for healthier living spaces.
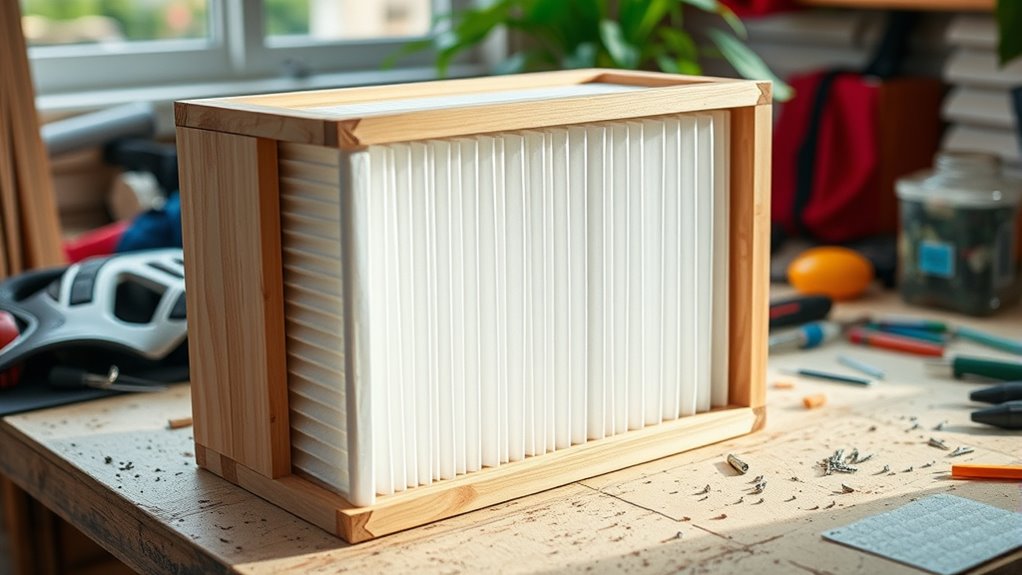
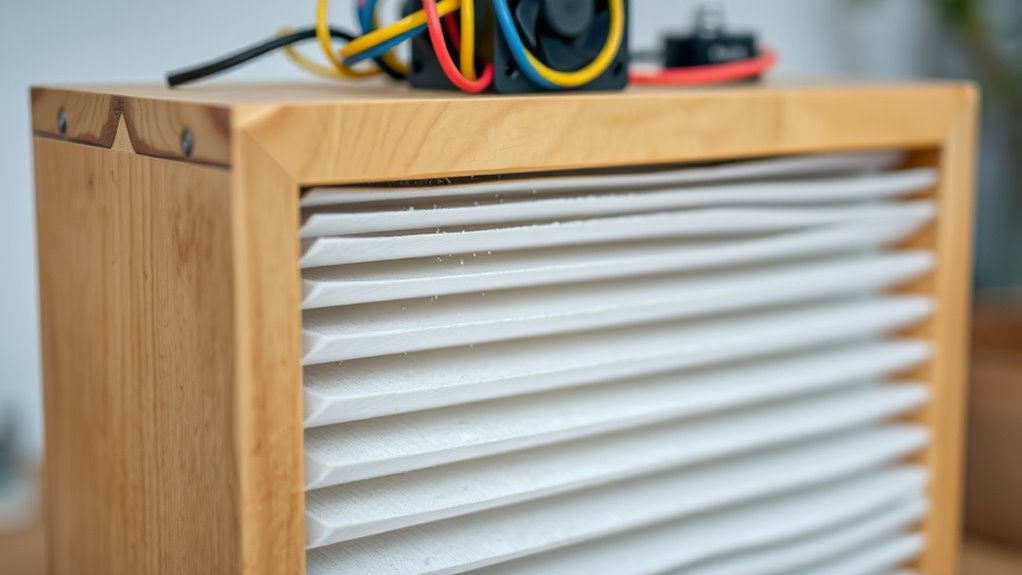
Start by gathering your materials: a sturdy box (like a repurposed cardboard or plastic container), a high-quality HEPA filter, a fan (preferably one with adjustable speed), and some duct tape or sealant. When assembling your DIY air purifying device, make sure to securely attach the filter to the inlet side of the fan. Seal all gaps around the filter with tape to prevent unfiltered air from bypassing the filter. This step is essential because any leaks reduce your device’s efficiency and compromise air quality. Position your fan so it pulls air through the filter and pushes it back into the room, creating a continuous cycle of clean air.
Once assembled, turn on the fan and monitor its performance. If you notice a significant drop in airflow, it might be time to check the filter for dirt buildup. Regular filter maintenance involves inspecting it every few weeks, depending on usage and air quality conditions. When the filter appears dirty or clogged, replace it promptly to keep your air purifier functioning at its best. Not only does this extend the lifespan of your device, but it also maintains high air quality by trapping more pollutants effectively. Remember, a clean filter means better filter maintenance, which directly impacts the overall air quality in your space.
You can also enhance your DIY project by adding a pre-filter made of washable material to catch larger particles before they reach the HEPA filter. This prolongs the life of your main filter and makes filter maintenance easier. Additionally, choosing durable and well-designed air purifier components can improve the longevity and efficiency of your homemade device. Keep in mind that the effectiveness of your homemade air purifier hinges on consistent filter care. Neglecting filter maintenance can lead to reduced airflow, increased energy consumption, and decreased air quality. Regularly replacing or cleaning your filters ensures that your DIY project remains a reliable source of cleaner, healthier indoor air. With a little effort, you can maintain excellent air quality at a fraction of the cost of commercial units, empowering you to breathe easier every day.
Frequently Asked Questions
How Often Should I Replace the HEPA Filter?
You should replace your HEPA filter based on its filter lifespan and replacement frequency recommendations, usually every 6 to 12 months. Pay attention to signs like decreased airflow or increased odors, which indicate it’s time for a change. Regularly checking your filter guarantees peak air purification. Keep in mind that environmental factors, such as indoor pollution levels, can affect how often you need to replace your filter.
Can I Use Alternative Materials for the Filter?
Imagine holding a sponge, thinking it might catch dust just like a filter. While filter material alternatives like activated carbon or DIY filtration options can help, they don’t match HEPA filters’ efficiency. Using unsuitable materials might release more pollutants or block airflow. So, if you’re considering alternatives, make sure they’re specifically designed for filtration, and understand they might not provide the same level of air purification.
What Is the Ideal Size for the DIY Box?
You want to know the ideal size for your DIY air purifier box, focusing on filter dimensions and box capacity. To optimize performance, choose a box that comfortably fits your HEPA filter without excessive gaps, typically around 12×12 inches or larger for good airflow. guarantee the box capacity allows for proper airflow and easy replacement. A well-sized box balances efficiency and practicality, enhancing your air purification effort.
How Much Noise Does the Filter Generate?
You might wonder about the sound level of your DIY HEPA filter box. Typically, the noise generated depends on the fan you choose, with quieter models offering better noise reduction. Expect a gentle hum that’s not disruptive, especially if you use soundproofing or place it in a less frequented area. Overall, with the right fan, your filter can operate quietly while effectively purifying the air.
Is This Project Safe for Children or Pets?
You should consider child safety and pet safety when building your own HEPA filter box. Make certain the device is securely enclosed to prevent curious kids or pets from accessing moving parts or electrical components. Use non-toxic, pet-safe materials, and keep the filter out of reach. Properly ventilate the area and supervise its use to avoid accidents, making your DIY project safe for everyone in your household.
Conclusion
Now that you’ve learned to craft your own HEPA filter box, you can breathe easier, create cleaner air, and take control of your environment. With simple steps, you’ll filter out dust, allergens, and pollutants—making your space healthier and more comfortable. Embrace the satisfaction of DIY, the confidence of self-sufficiency, and the peace of mind that comes with knowing you’ve created a safer, fresher home. Transform your space—one filter at a time.