
A DIY air exchange ventilator for your basement helps improve air quality by replacing stale indoor air with fresh outside air, reducing moisture, and preventing mold. You can create a simple system using small fans or exhaust vents connected to intake vents, sealing gaps carefully to prevent leaks. Proper placement and moisture management ensure consistent airflow without drafts. Keep in mind, choosing the right materials and controls enhances effectiveness—discover more ways to optimize your system below.
Key Takeaways
- Use simple fans or low-energy exhaust vents connected to outside air intake for effective airflow.
- Seal gaps around vents with weatherproof materials to prevent leaks and optimize air direction.
- Incorporate humidity sensors or timers to control fan operation and prevent over-ventilation.
- Position intake and exhaust vents strategically to ensure consistent, draft-free airflow throughout the basement.
- Add filters to vents to trap dust, allergens, and pollutants, improving indoor air quality.

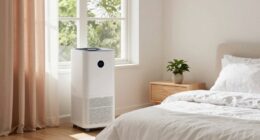
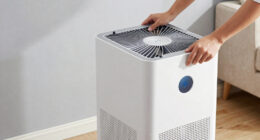
Creating a DIY air exchange ventilator can considerably improve your indoor air quality by continuously replacing stale air with fresh air from outside. When you’re working on a basement, ensuring proper ventilation isn’t just about comfort — it’s about safety and health. Poor ventilation can lead to high humidity levels and moisture buildup, which foster mold growth and structural damage over time. By building your own ventilator, you gain a cost-effective way to enhance ventilation efficiency and maintain better moisture control.
Building a DIY ventilator boosts air quality, reduces moisture, and protects your basement’s safety and health.
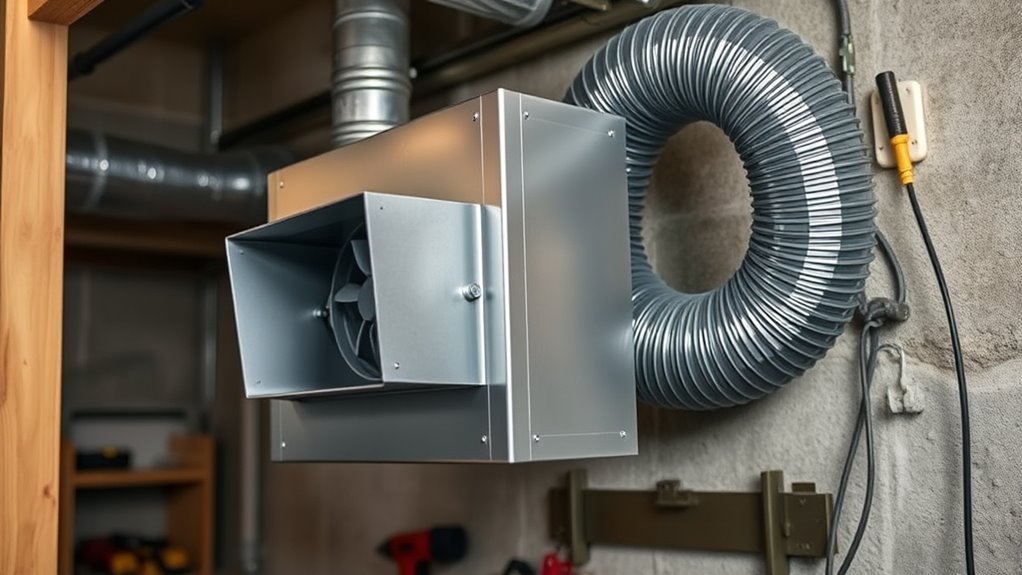
The key to an effective DIY air exchange system is designing it to maximize airflow while minimizing energy loss. You want your ventilator to draw in fresh, outside air effectively and expel the stale, humid indoor air without creating drafts or excessive noise. To do this, consider installing a simple fan or a low-energy exhaust vent connected to a fresh air intake. Positioning these components strategically in your basement ensures consistent airflow, which prevents stagnation and reduces moisture accumulation. When airflow is optimized, your basement stays drier, and the risk of mold and musty odors diminishes markedly.
Moisture control is essential in basements, as excess humidity can lead to serious problems, including structural deterioration and health issues. A well-designed ventilator helps regulate humidity levels by constantly exchanging moist indoor air with drier outside air. You can enhance moisture control by incorporating a humidity sensor or a simple timer to regulate when the fan operates, preventing over-ventilation during rain or high humidity days. This way, your system maintains a balance, reducing excess moisture without drying out the air too much, which can lead to discomfort.
Ventilation efficiency depends on how well your DIY system manages airflow paths and prevents leaks. Sealing gaps around your intake and exhaust vents ensures that air flows through the intended route, rather than escaping or entering through unintended openings. Using weatherproof materials and proper sealing techniques guarantees that your ventilator operates effectively over time. Additionally, adding filters can improve indoor air quality by trapping dust, allergens, and other pollutants, further supporting a healthier basement environment.
In addition, choosing the right materials and understanding vapor barrier principles can help prevent unwanted moisture infiltration and improve the overall effectiveness of your ventilation system. In the end, building your own air exchange ventilator provides you with control over your basement’s air quality. It’s a practical solution that, when properly designed, maximizes ventilation efficiency and offers reliable moisture control. With some basic tools and materials, you can create a system that keeps your basement dry, fresh, and healthier for you and your family. Proper ventilation isn’t just about comfort — it’s an essential step toward maintaining a safe, structurally sound, and mold-free space.

AC Infinity AIRTITAN T8, Crawlspace Basement Ventilator Fan, with WiFi App-Compatible Temperature Humidity Controller, IP-55 Rated, Exhaust
A fan system designed to provide ventilation and moisture control for crawl spaces and basements.
As an affiliate, we earn on qualifying purchases.
As an affiliate, we earn on qualifying purchases.
Frequently Asked Questions
What Is the Ideal Size for a Basement Air Exchange Vent?
The ideal size for a basement air exchange vent depends on your space, but generally, a vent between 4 to 6 inches in diameter works well. To maximize ventilation efficiency, guarantee proper vent placement—near the ceiling for intake and near the floor for exhaust. This setup promotes airflow, reduces humidity, and improves air quality. Adjust the size if your basement is larger or has specific ventilation needs.
How Often Should the Ventilator Be Maintained or Cleaned?
Think of your ventilator as the lungs of your basement. You should clean or replace the filters and perform maintenance every 3 to 6 months, depending on usage and environment. Regular maintenance keeps airflow smooth and prevents dust buildup. Follow your ventilator’s specific maintenance schedule, and don’t forget to inspect filters regularly—clean or change them when they appear dirty—to guarantee your basement remains fresh and well-ventilated.
Can I Install a DIY Ventilator in a Sealed Basement?
You can install a DIY ventilator in a sealed basement, but make certain your ventilation system compatibility first. Sealed spaces require proper air exchange to prevent moisture buildup and mold. Follow DIY installation tips like sealing leaks around the vent and choosing the right location for airflow. Properly designed, your DIY ventilator will improve air quality without compromising the basement’s sealed environment. Always test the system to ensure effective ventilation.
What Safety Precautions Are Necessary During Installation?
You need to prioritize electrical safety by turning off power before installation and using insulated tools to prevent shocks. Carefully read all instructions, guarantee proper grounding, and double-check connections. Wear safety gear like gloves and goggles, and work in a well-lit area. If you’re unsure about wiring or electrical work, consider consulting a professional. Proper tool use and safety precautions protect you from accidents and ensure your DIY project is safe and effective.
How Do I Prevent Backdrafts From the Ventilator?
To prevent backdrafts from your ventilator, guarantee proper ventilator sealing to eliminate leaks that could draw in air from unwanted sources. Incorporate backdraft prevention devices, like backdraft dampers or one-way vents, to stop reverse airflow. Regularly inspect and maintain your system, checking seals and dampers for wear or damage. Proper sealing and backdraft prevention measures keep your basement safe, ventilated, and free from harmful gases.

Kerykwan Portable Air Conditioner Window Vent Kit with 5.9” Exhaust Hose Adjustable Portable AC Window Kit for Ducting Universal Portable AC Seal Panel for Horizontal&Vertical Window
【WIDE COMPATIBILITY】Our air conditioner window kit is suitable for all air conditioner with external diameter of 5.9”.The AC…
As an affiliate, we earn on qualifying purchases.
As an affiliate, we earn on qualifying purchases.
Conclusion
Imagine standing in your basement, the stale air replaced by a gentle breeze, invigorating and crisp. With your DIY air exchange ventilator, you’ve turned a dark, musty space into a breath of fresh air. Every whisper of airflow whispers comfort and safety into your home. You’ve created a simple, effective solution that keeps the air flowing freely, transforming your basement into a healthier, more inviting space. Breathe easy, knowing you’ve made it better with your own hands.

TempPro TP50 Digital Hygrometer Indoor Thermometer Room Thermometer and Humidity Gauge with Temperature Humidity Monitor(Previously ThermoPro)
Wellness Indicator: This humidity meter with humidity level icon indicates air conditions – DRY/COMFORT/WET, allowing this humidity sensor…
As an affiliate, we earn on qualifying purchases.
As an affiliate, we earn on qualifying purchases.

Gainsh Crawlspace Ventilation Fan, 720 CFM Stainless Steel Basement Vent Fan, Ultra-Thin Reversible Airflow Window Exhaust Fan for Kitchen, Garage, Attic, Crawl Space & Grow Tent
Powerful 720 CFM Ventilation with Reversible Airflow This crawlspace ventilation fan delivers 720 CFM strong airflow for efficient…
As an affiliate, we earn on qualifying purchases.
As an affiliate, we earn on qualifying purchases.