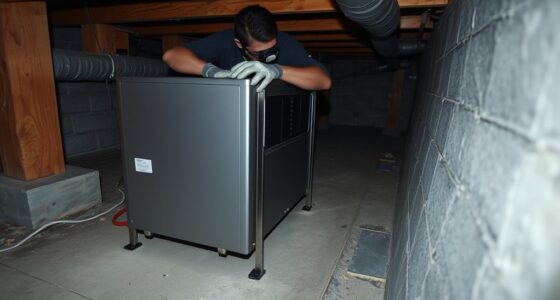
To prevent mold in your crawl space for good, you need a thorough setup that controls moisture. Start by sealing cracks and entry points, installing a durable vapor barrier on the ground, and ensuring proper ventilation with well-placed vents. Adding a dehumidifier suited to your space will help keep humidity levels low. Regular inspections, combined with these strategies, create an environment resistant to mold growth—continue to explore how each step works together for lasting protection.
Key Takeaways
- Install a vapor barrier on the crawl space floor to prevent soil moisture from seeping upward.
- Ensure proper ventilation with strategically placed vents and consider dehumidifiers to control humidity levels.
- Seal all cracks, gaps, and vents to block moisture entry and prevent mold growth.
- Improve drainage around the foundation to reduce external water intrusion and soil moisture buildup.
- Regularly inspect and maintain insulation, vents, and vapor barriers to sustain a mold-free environment.
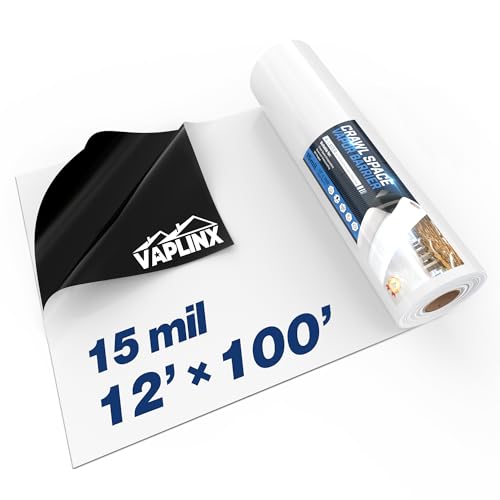
Crawl Space Vapor Barrier – 15 Mil Vapor Barrier – (12' x 100'), Tear Resistant, Heavy Duty Vapor Barrier Plastic, Drop Cloth Moisture Barrier Plastic Sheeting Covering for Crawlspace Encapsulation
15 Mil Crawl Space Vapor Barriers – Thickness: 15 Mil, Width: 12 Ft, Length: 100 Ft, Fully deployed…
As an affiliate, we earn on qualifying purchases.
As an affiliate, we earn on qualifying purchases.
Why Moisture Causes Mold in Your Crawl Space

Moisture in your crawl space creates the perfect environment for mold to thrive. When soil moisture levels rise, they can seep into your crawl space, raising humidity levels and encouraging mold growth. Without proper crawl space insulation, warm, moist air can condense on cool surfaces, providing ideal conditions for mold spores to settle and multiply. Excess soil moisture often leads to persistent dampness, which fuels mold development on wood, insulation, and other organic materials. If you neglect controlling soil moisture and don’t install effective insulation, you give mold the opportunity to spread, risking structural damage and health issues. Proper soil moisture management and ensuring proper insulation creates a barrier that prevents moisture from entering your crawl space, stopping mold before it starts. Additionally, implementing moisture barriers can significantly reduce the infiltration of ground moisture. Proper humidity control techniques can further reduce excess moisture, creating an inhospitable environment for mold growth. Employing effective ventilation strategies can also help maintain consistent humidity levels and prevent moisture buildup.
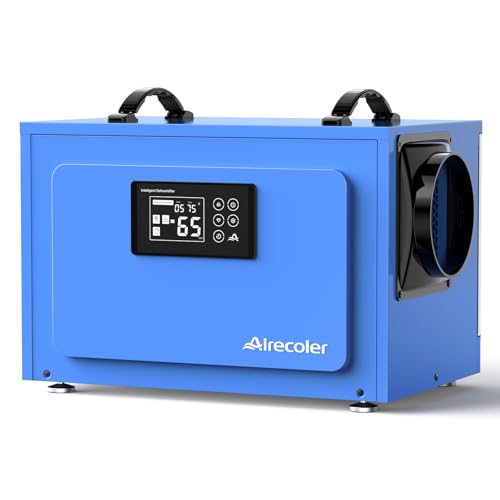
Airecoler 125 Pints Commercial Dehumidifier for Crawl Spaces & Basements with Drain Hose, Industrial Grade Water Damage Restoration for up to 6,000 sq ft, Auto Defrost, Memory Starting
Enhanced Commercial Dehumidification: Airecoler commercial dehumidifier GT-X5 stands out for its exceptional moisture removal, capable of extracting up…
As an affiliate, we earn on qualifying purchases.
As an affiliate, we earn on qualifying purchases.
How to Identify Sources of Moisture in Your Crawl Space

To control moisture, you need to find where it’s coming from. Check for vapor intrusion pathways that allow humid air or outside moisture to enter your crawl space. Also, look for water leaks or poor drainage that could be adding unnecessary moisture to the area. Additionally, inspecting for sources of excess humidity such as inadequate ventilation or high outdoor humidity levels can help prevent mold growth. Keep in mind that electric power generation devices like bike generators can sometimes be used in off-grid situations to power dehumidifiers or fans, assisting in moisture control efforts. Properly sealing entry points and assessing airflow patterns can further reduce unwanted humidity infiltration. Understanding natural ventilation techniques can also aid in promoting better air circulation and moisture reduction. Implementing water management strategies, such as drainage improvements or gutter extensions, can also significantly reduce moisture intrusion from external sources.
Vapor Intrusion Pathways
Vapor intrusion pathways often go unnoticed but are essential to identify when addressing crawl space moisture issues. These pathways allow soil gases, like radon, to seep into your home, potentially causing health risks. Soil permeability plays a key role, as highly permeable soils facilitate easier vapor movement. To detect these pathways, check for cracks in the foundation or vents that connect the soil to indoor air. Radon mitigation systems can help reduce harmful gases, but understanding vapor intrusion sources helps prevent moisture buildup. Sealing foundation gaps and improving ventilation can also block vapor entry. Being aware of how soil characteristics influence vapor movement enables you to implement effective barriers, keeping your crawl space dry and mold-free. Properly addressing vapor intrusion protects both your health and your home’s integrity. Recognizing the importance of pest control measures can also prevent additional moisture issues caused by insects or rodents, which often exacerbate mold problems. Additionally, assessing soil composition can help determine the likelihood of vapor intrusion and guide targeted mitigation efforts. Understanding **Soil permeability** is crucial because it directly impacts the ease with which vapor can migrate through the ground, affecting the effectiveness of your moisture prevention strategies. Moreover, paying attention to drainage patterns around your foundation can further reduce the risk of vapor intrusion and moisture accumulation.
Water Leaks and Drainage
Identifying the sources of water leaks and drainage issues is a key step in maintaining a dry, healthy crawl space. Look for visible signs like pooling water, dampness, or mold growth. Check gutters and downspouts to ensure proper drainage away from your foundation. Poor drainage can lead to radon mitigation problems and attract pests.
| Issue | Solution |
|---|---|
| Leaking pipes | Repair or replace damaged plumbing |
| Poor drainage | Install proper gutters and extend downspouts |
| Groundwater | Improve grading or add drainage systems |
Addressing these issues helps prevent mold, reduces moisture buildup, and supports pest control efforts. Regular inspection keeps your crawl space dry and minimizes radon risks.
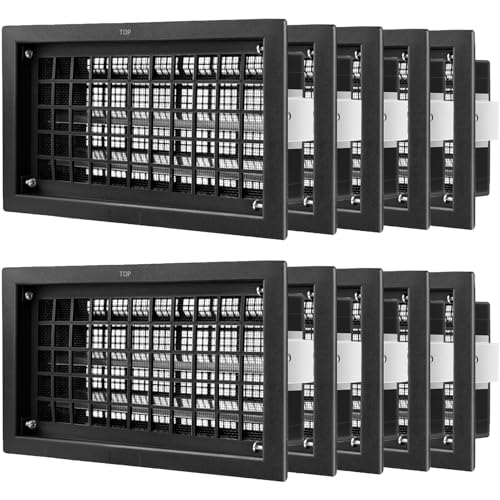
ZXQDRE Automatic Crawl Space Vent Cover 8×16 Inch, Auto Open/Close Foundation Vent Cover for Freeze Protection & Energy Saving | Easy Install Crawlspace Vents Replacement (Black, 10 Pack)
Automatic Temperature Control: Our automatic foundation vent for crawl space fully opens at 70°F and closes at 40°F….
As an affiliate, we earn on qualifying purchases.
As an affiliate, we earn on qualifying purchases.
Proper Ventilation Techniques for a Dry Crawl Space

To keep your crawl space dry, you need to use proper vent placement to promote good airflow. Setting a consistent ventilation schedule helps prevent excess moisture buildup. Improving airflow efficiency guarantees moisture doesn’t linger, protecting your home’s foundation.
Proper Vent Placement
Proper vent placement is essential for effective crawl space ventilation, guaranteeing moisture doesn’t accumulate and cause problems. You want vents positioned to promote cross-flow, which helps remove humid air and prevents mold. Place vents on opposite walls, ideally near the ground, to facilitate airflow. Use vent screens to keep pests out and debris away. When considering dehumidifier placement, position it where airflow is strongest, often near the vents, to optimize moisture removal. Properly placed vents and screens work together to maintain a dry environment. Additionally, selecting appropriate vent types can further enhance airflow efficiency and durability. Here’s a quick guide:
| Vent Placement Tips | Benefits |
|---|---|
| Opposite walls | Promotes cross-ventilation |
| Near the ground | Removes rising moisture |
| Vent screens | Keeps pests and debris out |
| Dehumidifier near vents | Improves moisture extraction |
| Regular inspection | Ensures proper function |
Maintaining proper crawl space ventilation is crucial for preventing mold growth and protecting your home’s foundation. Ensuring good airflow management is also vital to sustain a dry crawl space environment. Implementing effective ventilation techniques reduces humidity levels and extends the lifespan of your home’s structure by preventing the buildup of moisture, which can otherwise lead to mold and rot. Additionally, understanding the importance of vent placement can significantly improve the effectiveness of your moisture control efforts.
Ventilation Schedule Tips
Maintaining an effective ventilation schedule is key to keeping your crawl space dry and free from moisture buildup. Regularly opening vents during dry, cool weather promotes air circulation, helping to remove excess humidity. Conversely, during humid or rainy periods, reduce ventilation to prevent bringing in moist air. Use sensors or humidity monitors to track moisture levels and adjust your schedule accordingly. Proper humidity control is essential, so avoid over-ventilating, which can cause fluctuations that promote mold growth. Consistency is crucial—set a routine to ensure your crawl space is ventilated during ideal times. This approach prevents moisture accumulation, discourages mold, and maintains a healthier environment beneath your home. Effective scheduling makes all the difference in managing crawl space moisture long-term. Proper ventilation techniques help optimize airflow and prevent moisture issues. Additionally, understanding the climate conditions of your area can guide your ventilation strategy to adapt to seasonal changes effectively. Incorporating ventilation best practices ensures that your efforts remain consistent and effective throughout the year. Monitoring humidity levels regularly can further enhance your ability to maintain a dry crawl space, especially in areas with variable weather patterns.
Enhancing Airflow Efficiency
Enhancing airflow efficiency in your crawl space involves implementing effective ventilation techniques that maximize air exchange while minimizing moisture buildup. Start by carefully considering vent placement; vents should be evenly distributed and positioned to promote cross-ventilation, preventing stagnant air pockets. Proper vent placement helps maintain consistent airflow, reducing humidity levels. Additionally, selecting the right dehumidifier is essential—look for one suitable for your space’s size and humidity levels. A well-chosen dehumidifier works alongside ventilation to actively remove excess moisture, preventing mold growth. Regularly inspect and adjust vents as needed to guarantee optimal airflow. Combining strategic vent placement with an appropriate dehumidifier enhances overall airflow efficiency, creating a dry environment that discourages mold and protects your crawl space from moisture-related issues.

Whitecap Crawl Space Encapsulation Kit – 20 Mil Woven Vapor Barrier 12'x100', Covers 1,200 Sq. Ft., Includes 2 Seam Tape Rolls, Butyl Tape & 100 Fasteners – Heavy Duty Crawl Space Vapor Barrier
FULL CRAWL SPACE ENCAPSULATION KIT (UP TO 1,200 SQ. FT.) – All-in-one bundle designed to completely seal crawl…
As an affiliate, we earn on qualifying purchases.
As an affiliate, we earn on qualifying purchases.
How to Install Vapor Barriers to Prevent Ground Moisture

Installing a vapor barrier correctly is essential to prevent ground moisture from seeping into your crawl space. Start by cleaning the surface, removing debris and sharp objects that could puncture the barrier. Roll out the vapor barrier, ensuring it overlaps seams by at least 12 inches, and extend it up the walls a few inches for added protection. Secure it with tape or adhesive designed for vapor barriers. Proper foundation insulation underneath the barrier helps improve energy efficiency and prevents temperature fluctuations that cause condensation. Additionally, a well-installed vapor barrier discourages pests by eliminating damp hiding spots, supporting pest control efforts. Make sure the barrier lies flat and is free of wrinkles to ensure maximum effectiveness. Regular inspections will help maintain its integrity over time.
How to Choose the Right Dehumidifier for Your Crawl Space

After sealing your crawl space with a vapor barrier, choosing the right dehumidifier becomes vital to keep moisture levels in check. You need to take into account dehumidifier capacity to match your space size and make sure it can remove enough moisture daily. Energy efficiency is also essential to keep operating costs low. To help you decide, here’s a simple guide:
| Space Size | Recommended Capacity | Energy Efficiency Tips |
|---|---|---|
| Up to 1,000 sq ft | 30-50 pints/day | Look for ENERGY STAR models |
| 1,000-2,000 sq ft | 50-70 pints/day | Check for adjustable humidity settings |
| Over 2,000 sq ft | 70+ pints/day | Opt for units with auto-shutoff and low power consumption |
Choosing the right model guarantees ideal moisture control and energy savings.
Sealing Cracks and Air Leaks to Keep Moisture Out

Sealing cracks and air leaks is an essential step to prevent moisture from infiltrating your crawl space. By sealing gaps, you reduce the chances of humidity entering and causing mold growth. It also improves insulation efficiency and helps with pest control. Here are key actions to take:
- Inspect for visible cracks and gaps around vents, pipes, and the foundation walls.
- Use high-quality sealants or foam to close gaps and cracks thoroughly.
- Upgrade insulation to prevent thermal bridges that can attract moisture.
- Seal vents and entry points to minimize pest access and maintain dry conditions.
These measures work together to keep moisture out, protect your insulation, and reduce pest problems, creating a healthier crawl space environment.
Routine Inspection Tips to Prevent Crawl Space Moisture Problems

Regularly inspecting your crawl space helps catch moisture issues early before they develop into serious problems. Check humidity levels with a hygrometer to ensure they stay below 60%, reducing mold risk and preventing excessive dampness. Look for signs of standing water, condensation, or mold growth, which indicate moisture intrusion. Keep an eye out for pest activity, as pests thrive in moist environments and can damage insulation and wiring. Inspect vents, vent screens, and drainage systems to ensure proper airflow and water diversion. Address any leaks or cracks promptly to prevent moisture buildup. Consistent inspections empower you to maintain a dry, healthy crawl space environment, minimizing mold risk and pest problems, and supporting effective long-term moisture control.
Long-Term Solutions for Crawl Space Moisture and Mold Prevention

Implementing long-term solutions is essential to effectively prevent crawl space moisture and mold. You should invest in proper crawl space insulation to reduce temperature fluctuations and minimize condensation. Installing moisture sensors allows you to monitor humidity levels continuously, alerting you to potential issues early. Additionally, sealing vents and cracks keeps out humid air and pests, maintaining a dry environment. Consider encapsulating the crawl space with a vapor barrier for added protection. Regularly inspecting and maintaining these systems ensures ongoing effectiveness. Together, these measures create a balanced environment that discourages mold growth and moisture buildup, protecting your home in the long run. Proper insulation, sensor monitoring, sealing, and encapsulation form a thorough approach to crawl space moisture prevention.
Frequently Asked Questions
How Often Should I Inspect My Crawl Space for Moisture Issues?
You should inspect your crawl space at least twice a year for moisture issues. Regular inspection frequency helps you catch leaks, standing water, or mold early. Use moisture monitoring tools to keep an eye on humidity levels between inspections. If you notice any signs of excess moisture, like musty odors or damp insulation, check more often to prevent mold growth and maintain a healthy, dry crawl space environment.
Can Outdoor Weather Conditions Affect Crawl Space Moisture Levels?
Outdoor climate acts like a giant thermostat, influencing your crawl space’s moisture levels. Weather impact is real—rains can flood the area, raising humidity, while dry spells help keep it in check. Sudden temperature swings can cause condensation, encouraging mold growth. You should stay vigilant, especially during heavy storms or droughts, to guarantee your crawl space stays dry and mold-free. Regular inspections help you catch weather-related issues early.
Are There Eco-Friendly Options for Controlling Crawl Space Humidity?
Yes, you can use eco-friendly options like biodegradable dehumidifiers and recycled insulation to control crawl space humidity. Biodegradable dehumidifiers are safe for the environment and help reduce moisture effectively. Recycled insulation not only insulates your space but also minimizes waste and environmental impact. Using these sustainable solutions helps keep your crawl space dry and mold-free while supporting eco-conscious living.
What Are the Signs of Mold Growth Behind Walls or Flooring?
You’ll notice signs of mold growth behind walls or flooring through wall discoloration, often appearing as dark or fuzzy patches. Mold detection can also include a musty smell lingering in the area. If you see or smell these signs, it’s essential to investigate further, as mold can cause health issues and damage your home. Prompt action helps prevent hidden mold from spreading and causing more extensive problems.
How Long Does It Typically Take to See Results After Moisture Control Measures?
You can typically see results within a few days to a couple of weeks after implementing moisture control measures. The timing expectations depend on how effectively you reduce moisture levels, like fixing leaks and improving ventilation. As moisture decreases, you’ll notice less humidity and a drier environment. Keep monitoring your crawl space, and with consistent effort, mold growth will slow down and eventually stop, protecting your home long-term.
Conclusion
By keeping your crawl space dry, you create a fortress against mold and moisture. Imagine a cool, crisp space where every crack is sealed tight, and the air flows just right. With proper ventilation, vapor barriers, and routine checks, you’ll prevent dampness from sneaking in. Think of it as building a protective shield beneath your home—quiet, steadfast, and ready to keep mold at bay for good.