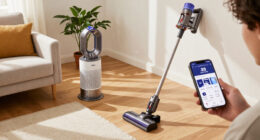
Set up an automatic air purifier so it can monitor air quality and adjust its fan speed in the room where you need it. This guide is for homeowners and renters who are new to air purifiers; it takes about 30–45 minutes, plus time for the unit to complete its initial air-quality reading. You will measure the room, choose a suitable purifier, place it with enough airflow around it, and check its automatic settings.

Get home appliances delivered free with Prime
- Fast, free delivery on millions of items
- Prime Video, Amazon Music and more included
- Member-only deals all year

MOOKA PR1 Air Purifier with H13 True HEPA Filter for Large Rooms
- ✔ Coverage area: Up to 2,200 sq. ft.
- ✔ Filter: H13 True HEPA, four-stage filtration
- ✔ Pre-filter: Washable

ECOSELF Air Purifier for Large Rooms up to 1,800 sq. ft.
- ✔ Coverage area: Up to 1,800 sq. ft.
- ✔ Air intake: 360°
- ✔ Filtration: Pre-filter, HEPA filter, activated carbon layer

VOOPNU Air Purifier for Home, 360° Airflow, White
- ✔ Coverage area: Up to 1,076 sq. ft.
- ✔ Dimensions: 6.69 × 6.69 × 9.84 inches
- ✔ Filtration: Triple-layer
Difficulty: Beginner | Time: 30–45 minutes
What You’ll Need
Tools & Materials:
- Tape measure or room dimensions
- Air purifier with an automatic or auto mode
- Manufacturer’s manual
- Access to a suitable wall outlet
Knowledge:
- Basic ability to measure a room and follow appliance instructions
Check the purifier’s recommended room size, filter type, and sensor location before setup. If you have asthma, allergies, or another health concern, use the purifier as one part of your home’s air-quality plan; it does not replace medical advice or source control such as fixing dampness or reducing smoke.
MOOKA PR1 Air Purifier with H13 True HEPA Filter for Large Rooms
The MOOKA PR1 is the strongest fit here when automatic operation needs to cover a larger shared space or account for pet-related air concerns. Its PM2.5 sensor feeds Auto mode, while a separate Pet mode gives buyers another setting aimed at homes with animals. The stated coverage of up to 2,200 sq. ft. is the largest in this lineup, and its four-stage filtration includes an H13 True HEPA filter and a washable pre-filter. That washable layer can make it easier to remove accumulated hair and larger debris between filter changes.Compared with ECOSELF, MOOKA offers more stated coverage and a dedicated Pet mode, while ECOSELF is the more compelling choice if a very quiet, fully dark Sleep Mode is the priority. MOOKA lists sleep noise as low as 26 dB, but the provided details do not say it turns off the display. Against VOOPNU, it has the clearer automatic-control case because the sensor and Auto mode are specified; VOOPNU is smaller and simpler to operate. The tradeoff is upkeep: MOOKA recommends replacing filters every 3–6 months, and its air-quality indicator may flash for about a minute while the sensor preheats after startup. For buyers who want sensor-guided operation and pet-oriented settings, those details are worth factoring into the routine.
Pros:
- PM2.5 sensor supports automatic fan adjustment.
- Pet mode complements Auto mode for homes with animals.
- Largest stated coverage in this comparison, up to 2,200 sq. ft.
- Washable pre-filter can help catch hair and larger debris.
Cons:
- Replacement filters are recommended every 3–6 months.
- Air-quality indicator may flash for about a minute during sensor warm-up.
- Its stated Sleep Mode noise floor is higher than ECOSELF’s 20 dB specification.
Best for: Households that want sensor-guided fan adjustment, a dedicated Pet mode, and the largest stated coverage in this comparison.
Not ideal for: Buyers prioritizing the quietest listed sleep setting, a confirmed display-off sleep mode, or minimal filter replacement chores.
Bottom line: Choose MOOKA when broad stated coverage, sensor-based Auto mode, and a Pet setting matter more than the quietest sleep specification.
“Choose MOOKA when broad stated coverage, sensor-based Auto mode, and a Pet setting matter more than the quietest sleep specification.”
ECOSELF Air Purifier for Large Rooms up to 1,800 sq. ft.
If the purifier will run near a bed, ECOSELF’s Sleep Mode is its most distinctive advantage: the stated noise level is 20 dB, and the display and indicator lights turn off. It also has a PM2.5 sensor that adjusts fan speed in Auto Mode, so it offers the automatic behavior central to this guide alongside practical controls such as a 1–24 hour timer, light control, and Child/Pet Lock. Its three-stage filter combines a pre-filter, HEPA filter, and activated carbon layer to help capture dust, lint, and pet hair and reduce everyday odors.MOOKA is the better match when you need the largest stated coverage or specifically want a Pet mode; ECOSELF is listed for up to 1,800 sq. ft. and has three fan speeds. Compared with the smaller VOOPNU, ECOSELF provides a specified sensor-driven Auto mode and a more detailed sleep setup, but VOOPNU’s compact dimensions may be easier to accommodate on a desk or in a tight corner. ECOSELF’s sleep specification is compelling, though the supplied details do not give a noise figure for its other speeds. Filter replacement is recommended every 3–6 months, and the manufacturer recommends genuine ECOSELF filters, a recurring maintenance consideration for owners.
Pros:
- PM2.5 sensor adjusts fan speed in Auto Mode.
- Sleep Mode is specified at 20 dB and turns off display and indicator lights.
- Timer, light control, and Child/Pet Lock support routine use at home.
- Activated carbon layer helps address everyday odors.
Cons:
- Stated coverage is below MOOKA PR1’s listed 2,200 sq. ft.
- Filter replacement is recommended every 3–6 months.
- Manufacturer recommends genuine ECOSELF replacement filters.
Best for: People who want sensor-based automatic fan adjustment in a bedroom or other room where low sleep noise and lights-out controls matter.
Not ideal for: Buyers who need the largest stated coverage, want a dedicated Pet mode, or prefer not to depend on the manufacturer’s recommended replacement filters.
Bottom line: Pick ECOSELF for quiet, lights-out sleeping and automatic adjustment when its stated coverage fits your room.
“Pick ECOSELF for quiet, lights-out sleeping and automatic adjustment when its stated coverage fits your room.”
VOOPNU Air Purifier for Home, 360° Airflow, White
VOOPNU is the easiest one in this group to place when floor or shelf space is limited. Its listed dimensions are 6.69 × 6.69 × 9.84 inches, and the 360° intake lets the unit draw air from around its body rather than needing a specific front-facing position. A one-tap control panel keeps operation uncomplicated, while the triple-layer filter is claimed to capture 99.97% of airborne pollutants. The stated cleaning rate—250 sq. ft. every 15 minutes—offers a more concrete room-planning reference than coverage alone.There is an important distinction for shoppers seeking an automatic purifier: unlike MOOKA and ECOSELF, the supplied VOOPNU details do not specify a PM2.5 sensor or sensor-driven Auto mode. It can still suit a home where compact placement and straightforward manual operation matter more than automatic response. Its listed coverage is up to 1,076 sq. ft., below both larger alternatives, though it is the quietest by the provided minimum-noise figures at as low as 22 dB. The built-in essential-oil tray is an optional convenience, not a substitute for filtration. VOOPNU recommends continuous operation for optimal performance and official replacement filters, so buyers should be comfortable with both ongoing use and that filter guidance. MOOKA is more tailored to pets, while ECOSELF gives a stronger sensor-and-bedroom package.
Pros:
- Compact listed dimensions suit desks, shelves, and tight corners.
- 360° intake supports flexible positioning.
- One-tap controls keep operation simple.
- As-low-as 22 dB noise specification and an essential-oil tray.
Cons:
- Provided details do not specify an air-quality sensor or Auto mode.
- Stated coverage is lower than MOOKA and ECOSELF.
- Manufacturer recommends continuous operation and official replacement filters.
Best for: Buyers who need a small, easy-to-place purifier with simple controls and are comfortable choosing its operation without a specified sensor-based Auto mode.
Not ideal for: Shoppers who specifically require automatic fan adjustment in response to measured air quality, or need the largest stated room coverage.
Bottom line: Choose VOOPNU for compact placement and simple operation if sensor-driven automatic adjustment is not a requirement.
“Choose VOOPNU for compact placement and simple operation if sensor-driven automatic adjustment is not a requirement.”
As an Amazon Associate we earn from qualifying purchases.
Before You Start
Choose a purifier that lists a clean air delivery rate (CADR) suitable for the room, if that rating is available. A larger room or a need for faster air cleaning calls for a higher CADR. Room-size claims vary by manufacturer and may assume different air changes per hour, so compare the stated coverage and CADR rather than relying on the word “large.”
Automatic mode uses the unit’s sensor to change fan speed. Sensors may respond to particles, odors, or other measurements depending on the model, and they do not detect every pollutant. Keep the purifier away from smoke, cooking fumes, sprays, and direct sunlight during setup, since these can affect readings or make the unit run harder.
Step-by-Step Instructions
Step 1: Measure the room
Measure the room’s length and width, then multiply them to estimate its floor area. For an irregular room, measure sections separately and add the areas. If the room has an unusually high ceiling or connects openly to another space, treat the effective area as larger than the floor measurement alone.
Tip:Write down the area and compare it with the purifier’s coverage rating. If the room is near the maximum stated coverage, a model with more capacity may clean the air faster and spend less time at its highest setting.
Check: You have a room-area estimate and know whether the purifier’s stated coverage includes that size.
Step 2: Check the filter and prepare the unit
Read the setup instructions and inspect the filter compartment. Remove packaging from the filter, including any plastic bag or protective film, then reinstall the filter in the direction shown by the arrows or labels. Close the compartment fully before plugging in the purifier.
Tip:Do not run the purifier with a wrapped filter or without a filter unless the manual specifically directs you to do so. Keep the packaging or note the filter model so you can buy a compatible replacement later.
Check: The filter is unwrapped, seated in the correct direction, and the cover is closed without a warning light.
Step 3: Choose a location with clear airflow
Place the purifier on a stable, level surface in the room you measured. Leave the clearances specified in the manual around air inlets and outlets. Keep it away from curtains, furniture, walls that block vents, heaters, and places where it could be bumped or exposed to water.
Tip:Put the purifier in the room where people spend the most time or where the main particle source is located. A single portable unit generally works best when it can circulate air within one room; avoid hiding it in a corner or behind furniture.
Check: Air can move freely into and out of the unit, and the purifier is positioned where it can serve the intended room.
Step 4: Plug in and configure basic settings
Connect the purifier directly to a suitable wall outlet, then turn it on. Set the clock or connect the app only if you plan to use scheduling or remote controls. Review the manual for any initial sensor warm-up period, filter reset procedure, or required calibration.
Tip:Do not assume a filter indicator will reset itself when you install a new filter. If the unit displays a replacement alert after installation, use the model’s reset instructions rather than removing the filter again.
Check: The display or status lights show that the purifier is powered, with no setup or filter installation warning.
Step 5: Enable automatic mode
Press the control labeled “Auto,” “Automatic,” or its equivalent in the app. Check the display to confirm that automatic mode is active. If the purifier offers separate sensor options, select the one that matches your needs and follow the manual’s instructions for changing it.
Tip:Auto mode can be quieter when readings are low and louder when the sensor detects a change. If the unit has a sleep setting, check whether it overrides automatic fan adjustments overnight.
Check: The display or app clearly indicates automatic mode, and the fan is allowed to change speed based on the model’s sensor readings.
Step 6: Check sensor placement and response
Let the purifier run for the sensor settling time listed in the manual. Watch its air-quality display or indicator under normal room conditions. Do not deliberately expose the sensor to smoke, aerosol sprays, or strong fumes to test it; those can be harmful or leave residue in the unit.
Tip:Some models show a number, while others use colored lights or a simple status label. A low reading does not prove that all gases or pollutants are absent; it reflects only what the purifier’s sensor is designed to measure.
Check: The sensor gives a stable reading or status after its initial settling period, and the unit remains in automatic mode.
Step 7: Set a maintenance reminder
Find the filter-life indicator or maintenance schedule in the manual. Note the recommended cleaning interval for any washable pre-filter and the replacement interval for the main filter. Set a calendar reminder or app alert, and record the filter model and installation date.
Tip:Replace filters based on the manufacturer’s instructions and the unit’s condition. Dust, smoke, pets, and long daily run times can shorten filter life; a timer is a guide, not a guarantee that the filter is still clean.
Check: You know how to check the filter, when to inspect it, and which replacement fits your purifier.
Common Mistakes to Avoid
- Choosing a purifier based only on a broad room-size claim. — Compare the room area with the model’s coverage and CADR details. Choose additional capacity if the room is near the stated limit or needs faster cleaning.
- Leaving protective plastic on the filter. — Inspect and unwrap the filter before installation; airflow through a sealed filter is restricted.
- Placing the purifier where furniture or curtains block its vents. — Follow the clearance distances in the manual and leave a clear path around the air inlet and outlet.
- Assuming auto mode detects every harmful substance. — Check which pollutants the sensor measures. Use source control and ventilation where appropriate, since a sensor reading is not a complete air-safety test.
Troubleshooting
Problem: The purifier runs at high speed continuously.
Solution: Check the air-quality indicator and look for nearby cooking, smoke, candles, sprays, or heavy dust. Move the unit away from the source if appropriate, clean any sensor opening as directed by the manual, and allow the reading to settle. If the reading stays high under clean conditions, consult the manufacturer.
Problem: The air-quality indicator does not change.
Solution: Confirm that the model’s sensor is active in the selected mode and that its intake is not blocked. Review any warm-up or calibration steps. Some units update slowly or use broad color categories rather than showing small changes.
Problem: A filter warning remains after replacing the filter.
Solution: Use the manual’s filter-reset sequence or app control. Verify that the replacement filter matches the model and that the compartment cover is fully closed.
Problem: The purifier is too loud in automatic mode.
Solution: Check whether the sensor is reacting to a nearby source or whether vents are obstructed. Move the unit to a better location and use a sleep or quiet schedule if available; confirm whether that setting limits automatic fan changes.
What Success Looks Like
The purifier has the correct unwrapped filter, sits in the intended room with unobstructed airflow, and shows automatic mode as active. After any required sensor settling period, it displays a reading or status and has no installation warning. You also know how to inspect or replace the filter and have a reminder for maintenance.
Next Steps
Run the purifier regularly in the room it serves, following the manufacturer’s guidance for continuous use and filter care. Inspect the pre-filter and sensor openings at the stated intervals, and keep a compatible replacement filter on hand if the model uses disposable filters. If you move the unit, preserve the airflow clearances and allow its sensor to settle in the new location.
Frequently Asked Questions
Should I leave an automatic air purifier running all day?
Many portable purifiers are designed for extended operation, but follow the manual’s operating and placement guidance. Continuous use can help maintain cleaner air in the room, though fan speed, noise, and filter life vary by model and conditions.
Does automatic mode turn the purifier off when the air is clean?
That depends on the model. Some units reduce fan speed, while others keep running at a low setting. Check the manual to see how auto mode behaves and whether sleep or scheduling settings change it.
Where should I put an air purifier in a bedroom?
Place it on a stable surface with the required space around the vents, away from curtains and furniture. Keep it where it can circulate room air without blowing directly into bedding if that is uncomfortable.
How often should I replace the filter?
Use the interval and indicator guidance for your model, then adjust for heavy dust, smoke, pets, and daily runtime. Check the filter periodically; replace it when directed or when its condition and the manufacturer’s instructions call for it.
Can one purifier clean my whole home?
A portable purifier is generally sized for a room or open area, not a whole house with closed doors and separated rooms. For several rooms, use appropriately sized units in the spaces where people spend time or consider a system designed for whole-home air cleaning.