Getting your new Keurig K-Mini Single Serve Coffee Maker ready for use is straightforward, but following the correct setup process ensures optimal performance and safety. Whether you’re a first-time Keurig user or just need a refresher, this step-by-step guide will walk you through the entire setup, from unboxing to brewing your first cup.

Get home appliances delivered free — and shop member deals
- Fast, free delivery on millions of items
- Access to Prime Big Deal Days deals on October 6–7
- Prime Video, Amazon Music and more included
Additionally, we’ll cover troubleshooting tips and maintenance suggestions to keep your coffee maker in top shape. With clear instructions and safety tips, you’ll be brewing your favorite coffee in minutes.
Key Takeaways
| Compact Design | Fits easily in small spaces with less than 5 inches width. |
| Custom Brew Sizes | Choose between 6-12oz brew sizes for personalized servings. |
| Easy Water Refill | Single cup reservoir requires fresh water for each brew. |
| Quick & Fresh Brewing | Brew coffee in just minutes with minimal effort. |
| Maintenance Matters | Regular descaling and cleaning ensure best flavor and machine longevity. |
Unboxing and Preparing Your Keurig K-Mini
- Carefully remove the Keurig K-Mini from its packaging, ensuring all components are present: the coffee maker, power cord, and user manual.
- Place your Keurig on a flat, stable surface near an electrical outlet. Ensure there’s enough space for water filling and cleaning.
- Remove the water reservoir cap and fill the reservoir with fresh, cold water up to the MAX fill line. The K-Mini has a single cup reservoir, so you’ll add water for each brew.
Connecting and Powering Up
Plug the power cord into an outlet. The K-Mini features an auto-off function that activates 90 seconds after your last brew, conserving energy.
Press the power button to turn on the machine. The indicator light will turn on, signaling it’s ready for brewing. Wait until the water reservoir light stops blinking, indicating the machine is heated and ready.
Preparing for Your First Brew
- Lift the brew head and insert a K-Cup pod of your choice into the holder. Close the lid securely.
- Select your desired brew size between 6-12oz by pressing the corresponding button.
- Place a mug or travel cup on the removable drip tray, which accommodates cups up to 7 inches tall.
- Press the brew button and wait for your coffee to dispense. The machine heats and brews in just minutes.
Troubleshooting Common Setup Issues
- Machine not turning on: Check the power cord connection and outlet. Try plugging into a different outlet if necessary.
- No water flow: Ensure the water reservoir is filled and seated correctly. Remove and reattach if needed.
- Leaking or dripping: Verify the water reservoir cap is sealed properly and the brew head is closed tightly.
- Machine not heating: Make sure the power is on and wait a few minutes for heating to complete. If persistent, contact support.
Maintenance and Cleaning Tips
Regular cleaning ensures your Keurig K-Mini brews at its best. Use the included rinse pods or descaling kits to remove mineral buildup and flavor residue.
Descale your machine every 3-6 months using a descaling solution or the Keurig 3-Month Brewer Maintenance Kit. Always rinse thoroughly after descaling to prevent any lingering taste or residue.
The Products in This Guide

Keurig K-Mini Single Serve K-Cup Pod Coffee Maker
- ✔ Weight: 5.9 lbs
- ✔ Mug Height: Up to 7 inches
- ✔ Water Capacity: Single cup

My K-Cup® Reusable Coffee Filter
- ✔ Weight: 2.5 oz
- ✔ Reusability: Yes
- ✔ Compatibility: K-Mini, K-Select, and more
Keurig K-Mini Single Serve K-Cup Pod Coffee Maker
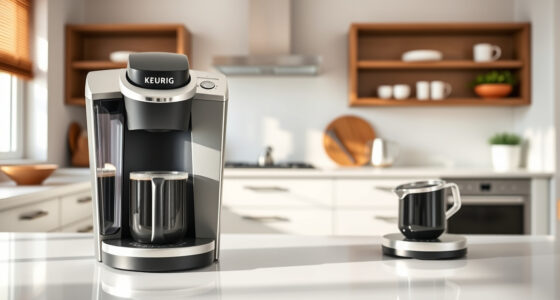
The Keurig K-Mini Single Serve Coffee Maker offers a sleek, space-saving design that fits in any small kitchen or office. Despite its compact size, it delivers quick, fresh coffee with customizable brew sizes, making it ideal for single servings.
Pros:
- Fits easily in small spaces
- Brew sizes from 6-12oz
- Removable drip tray for travel mugs
- Auto off energy-saving feature
Cons:
- Single cup reservoir requires refilling for each brew
- Limited to K-Cup pods (or reusable filter)
- No water filter built-in
Best for: Individuals with limited space seeking quick, reliable coffee brewing.
Not ideal for: Large households or those needing multiple cups at once.
Bottom line: A practical, space-efficient coffee maker perfect for small kitchens or offices.
My K-Cup® Reusable Coffee Filter
The My K-Cup® Reusable Coffee Filter is an excellent addition for those who prefer using ground coffee. Compatible with the Keurig K-Mini and other models, it allows you to brew your favorite blends with ease and eco-friendliness.
Pros:
- Brew with ground coffee
- Reusable and eco-friendly
- Compatible with Keurig models including K-Mini
- Extracts full flavor
Cons:
- Requires regular cleaning
- May need adjustments for grind size
- Less convenient than pre-packaged pods
Best for: Coffee drinkers who want to customize flavors and reduce waste.
Not ideal for: Those who prefer the convenience of pre-packaged K-Cup pods.
Bottom line: A versatile, eco-friendly option for ground coffee lovers using Keurig.
Frequently Asked Questions
Can I use ground coffee with my Keurig K-Mini?
Yes, by using a reusable filter like the My K-Cup, you can brew ground coffee directly in your Keurig K-Mini.
How often should I descale my Keurig K-Mini?
It’s recommended to descale your Keurig every 3 to 6 months, or more frequently if you notice slow brewing or mineral deposits.
Can I brew larger than 12oz with the K-Mini?
No, the maximum brew size for the K-Mini is 12oz. If you need larger servings, consider a different model.
What should I do if my machine isn’t heating?
Ensure the machine is plugged in properly, and give it some time to heat. If it still doesn’t heat, try descaling or contact customer support.
Is the water reservoir refillable without removing it?
No, you’ll need to remove the reservoir cap and fill it manually each time before brewing.
Enjoy Your Perfect Cup with Your New Keurig K-Mini
Setting up your Keurig K-Mini is quick and simple, ensuring you can start enjoying fresh coffee in just minutes. Proper maintenance, including regular descaling and cleaning, will keep your machine functioning optimally and your beverages tasting their best. Whether you’re brewing with K-Cup pods or ground coffee using a reusable filter, your coffee experience is customizable and convenient. Now, just sit back and savor your favorite brew every day!
Affiliate disclosure: As an Amazon Associate we earn from qualifying purchases. Prices and availability are accurate as of the time of publishing.
NFL season / tailgating Picks
team gear
As an affiliate, we earn on qualifying purchases.